What Are the Best Welding Machines to Buy?
Choosing the best Welding Machine starts with an honest look at the work ahead. Will you repair a steel gate, fabricate thin sheet metal, or weld outdoors where wind can disrupt shielding gas? The right choice depends on material, thickness, power supply, portability, and your experience—not the longest feature list.
The market is growing, but that figure cannot choose a machine for you. Grand View Research estimated the global welding equipment market at about $15.2 billion in 2022 and projected continued growth through 2030. That estimate describes an industry, not a guarantee of quality or value. For practical selection, the American Welding Society’s guidance on welding processes and safety provides a stronger foundation than marketing claims. Compare process suitability, duty cycle, available service, and consumable costs before buying.
Keep it practical. Jody Collier, a welding educator known for hands-on instructional work, offers a useful principle—paraphrased here rather than presented as a direct quotation: match the machine to the jobs you actually do. A compact MIG unit may suit occasional garage repairs; a multiprocess model may make sense when projects vary. Yet more capability can mean more controls to learn. I have to admit, “best” is not a single model. This guide compares machine types, key specifications, and common trade-offs so you can shortlist options with clear reasons. Check the manufacturer’s manual and use appropriate protective equipment before welding.
Identify the Welding Process: MIG, TIG, Stick, or Flux-Cored
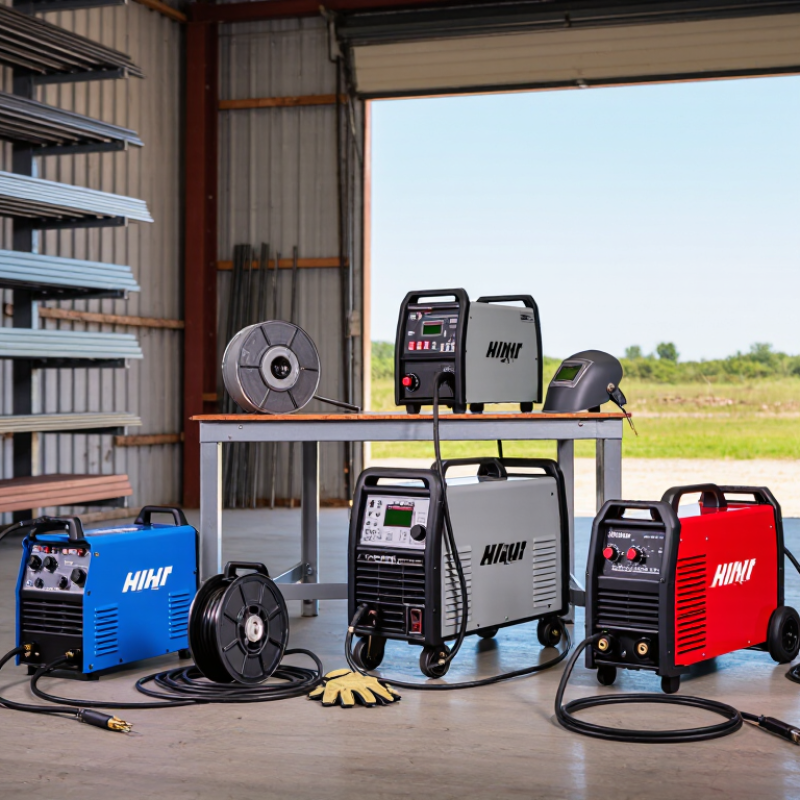
MIG suits clean steel, repeatable shop work, and beginners who need a forgiving arc. A spool gun can help with aluminum, but check whether the machine supports one. TIG gives precise control on thin stainless steel and aluminum, though it demands cleaner surfaces, steady hands, and more setup time. It is slower. Stick welding tolerates outdoor conditions and less-than-perfect steel, making it practical for repairs. Flux-cored wire can also handle outdoor work; self-shielded wire avoids a gas cylinder, but leaves slag to remove.
Match the process to the work, not just the advertised amperage. Check the machine’s input power, usable material thickness, and duty cycle at the amperage you expect to use. A small machine may weld thin sheet well yet struggle on heavier plate. A high duty cycle matters when making long, repeated passes. Even this rule has limits.
The U.S. Bureau of Labor Statistics’ Occupational Outlook Handbook projected about 42,600 annual openings for welders, cutters, solderers, and brazers from 2022 to 2032. That labor figure does not rank welding processes, but it signals steady demand for practical welding skills. For a home garage, compare MIG’s convenience with the added gas and wire costs. For field repairs, weigh Stick or self-shielded flux core against cleanup and spatter. I would still test a machine on scrap of the same thickness before buying; spec sheets rarely reveal how comfortable the arc feels.
Match Output Amperage to Your Materials and Typical Weld Thickness
When choosing a welding machine, start with the metal you expect to weld and its usual thickness. A small repair on 1/16-inch sheet steel needs far less current than joining 1/4-inch plate. For occasional work on mild steel around 1/8 inch thick, a machine delivering roughly 90–130 amps may be adequate, depending on the welding process and joint design. Check the machine’s output chart rather than treating that range as a guarantee.
Allow some headroom. A unit that reaches its limit on every weld may feel frustrating, especially on thicker material or longer beads. Aluminum also draws heat away quickly, so it often calls for more output than steel of similar thickness. Still, higher amperage alone does not ensure a sound weld; fit-up, wire or electrode choice, and technique matter. Duty cycle matters, too. A machine rated at 150 amps for a short duty cycle may need frequent cooling breaks during sustained work. Look at the amperage you will use most, then confirm the machine can maintain it at your expected pace. I’d leave room for a thicker project now and then, but not pay for capacity that will sit unused. Check your plans twice. It is easy to underestimate how often material thickness changes.
What Are the Best Welding Machines to Buy?
Match output amperage to your materials and typical weld thickness.
These are approximate working-current ranges for mild steel, not universal settings. Actual requirements vary with welding process, joint design, position, and consumables. Choose a machine with suitable rated output and duty cycle for your intended work.
Compare Duty Cycles on IEC 60974-1’s 10-Minute Rating Basis
When comparing welding machines, read the duty cycle beside its rated welding current. Under IEC 60974-1, the rating uses a ten-minute period. A 60% duty cycle means six minutes of welding, followed by four minutes of rest, at the stated conditions. That detail matters. A machine rated at 200 amps and 60% is not directly comparable to one rated at 150 amps and 60%.
Check the current you expect to use, not only the biggest number on the product sheet. A machine might offer a high output briefly but require longer cooling breaks at that setting. For a typical job, compare ratings at the current and process you will actually use. Also check the manual for the specified ambient temperature and ventilation requirements. Dusty vents or a hot workshop can affect real-world performance. Small details count.
I would not choose by the duty-cycle percentage alone. It is easy to overvalue one figure; I still find that tempting. Consider whether your work involves short, occasional welds or longer runs on thicker material. A lower rating may be adequate for brief repairs, while repeated welds can make cooling pauses frustrating. Leave some headroom when possible, and treat the stated rating as a test-based guide, not a promise that every working environment will behave exactly alike.
What Are the Best Welding Machines to Buy? — Compare Duty Cycles on IEC 60974-1’s 10-Minute Rating Basis
Duty-cycle percentages below are purchasing targets, not specifications for every machine in a category. Under the 10-minute rating basis, a 40% duty cycle means 4 minutes welding at the stated output, followed by 6 minutes without welding. Always compare the duty cycle at the actual welding current shown on the machine’s rating plate, and check its specified test conditions.
| Machine type |
Best suited to |
Duty-cycle target to compare |
Welding time per 10 minutes |
Rest time per 10 minutes |
Buying consideration |
| Portable stick (MMA/SMAW) inverter |
Repairs, farm work, and outdoor welding where portability matters |
At least 20% at the output current you expect to use |
2 minutes |
8 minutes |
Check input-power requirements and electrode range; a higher duty cycle is useful for repeated welds. |
| General-purpose MIG/MAG |
Home workshops, light fabrication, and occasional production work |
Around 30–40% at the intended working current |
3–4 minutes |
7–6 minutes |
Compare ratings at the same current, not just maximum amperage; check wire-feed and shielding-gas requirements. |
| AC/DC TIG (GTAW) machine |
Precise work on steel and, with AC capability, aluminum |
Around 35–40% at the intended current |
3.5–4 minutes |
6.5–6 minutes |
Confirm AC/DC output, torch compatibility, and whether the rating applies to the process and current you plan to use. |
| Multi-process workshop machine |
Users who need more than one process for varied repair or fabrication jobs |
At least 30% for the process and current used most often |
3 minutes |
7 minutes |
Duty-cycle ratings can differ by process; compare the relevant rating for each mode rather than assuming they are identical. |
| Production-oriented machine |
Repeated or longer welds in a fabrication or industrial setting |
60% or higher at the required working current |
6 minutes or more |
4 minutes or less |
For frequent welding, prioritize the duty-cycle rating at your actual operating current and verify the supply and cooling requirements. |
Calculation: welding minutes = duty-cycle percentage × 10 minutes; rest minutes = 10 minutes − welding minutes. A machine’s allowable output and duty cycle depend on its rating and specified conditions, so use the manufacturer’s rating plate and documentation when making a final comparison.
Check Input Power, Process Compatibility, and Safety Features
Choosing a welding machine starts with the power available at your workbench. Check whether it runs on 120-volt or 240-volt input, and confirm the circuit can handle its rated current. A long extension cord can cause voltage drop and unstable arcs. Check the machine’s duty cycle, too: a 20% rating at a stated amperage means about two minutes of welding in a ten-minute period. Small details matter. Match the process to your work. MIG suits many thin-to-medium steel projects, while TIG offers more control on thinner material. Stick welding can be practical outdoors, where wind may disrupt shielding gas. Make sure the machine supports the metals, thicknesses, and electrode types you expect to use.
Safety features deserve the same attention as output. Look for thermal overload protection, clear warning labels, and properly insulated leads. Check that the machine’s grounding connection is secure, and use suitable eye, hand, and respiratory protection. The NFPA’s 2016 report, based on U.S. data from 2010–2014, estimated that hot work started 4,580 structure fires annually. That figure covers hot work broadly, not welding machines alone, but it shows why fire prevention belongs in the buying decision. Keep combustible materials away, and follow the machine’s ventilation guidance.
Tips: Before buying, compare the rating plate with your outlet and circuit breaker. Check the torch, clamp, and cable lengths in person if possible. I still find cable reach easy to underestimate. Check the label.
Choose a Machine for Your Skill Level, Workload, and Budget
Choose a welder for the jobs you will actually do, not an imagined workshop.
For occasional repairs on mild steel, a compact stick machine may be enough. It handles outdoor work well, though beginners often need practice keeping a steady arc. For clean indoor projects and thinner sheet metal, MIG can feel easier to learn. TIG offers fine control for detailed work, but it usually demands more time and coordination. That trade-off matters.
Your skill level should shape the controls you need.
A beginner may benefit from clear settings and a stable arc more than a long list of adjustments. Experienced welders may value broader output control for different metals and thicknesses. Match the machine’s output to your material, and check its duty cycle at the amperage you expect to use. A higher number is not automatically better if your sessions are brief. Check the outlet.
Workload changes the budget.
Compare the machine price with the cost of a helmet, gloves, clamps, wire or electrodes, and replacement parts. Confirm that your home or shop power supply can support the machine before buying; adapters do not solve every electrical limitation. If you weld for hours, a stronger duty cycle can reduce waiting for the machine to cool. For occasional repairs, paying extra for capacity you rarely use may not be worthwhile. I might still choose a little room to grow, but that depends on the next project—and plans can change.